While turkey is most famously enjoyed during the Christmas season, with frozen birds available in many local supermarkets, it’s entirely possible to enjoy this healthy protein option throughout the year.
Here’s a fun fact: turkey has a special relationship with one of Malaysia’s heritage Kristang dishes – devil curry. Traditionally, devil curry was made using leftover turkey the day after Christmas, sort of like a Boxing Day treat.
Nowadays, however, devil curry tends to be part of the Christmas spread, and is often made with chicken. Plus, the bigger your family get-togethers, the less turkey remains at the end of the day!
Continuing from yesterday: now that you’ve cleaned and brined your bird (and may or may not have removed its wishbone), it’s time to prepare it for roasting!
Step 5: The butter trick
Besides moist and flavoursome meat, the perfect turkey also has crispy and perfectly browned skin. This butter trick is optional, but it sure adds that extra oomph to your roast. You can use this technique with chicken, too!
All you need is some softened butter. Here’s what you do:
- Gently insert your fingertips into the space between the skin and flesh, and push your whole hand in as you slowly separate the skin from the flesh. Be careful not to tear the skin.
- Separate the skin on the breast right up to the neck, the sides, along the back, as well as the top of the thighs. You don’t have to separate the skin on the drumsticks or wings.
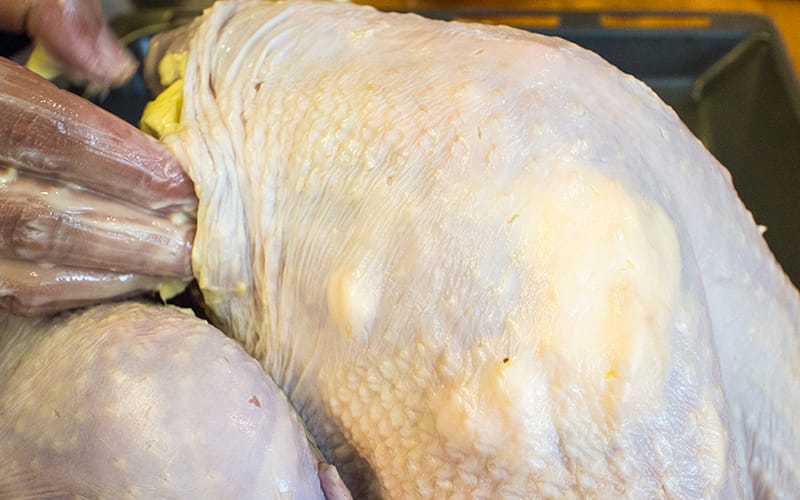
- Grab a lump of butter and spread it all over the flesh beneath the separated skin. It doesn’t have to be perfectly even, as long as you rub some butter everywhere.
- Here’s a helpful tip: short fingernails make this step a little easier!
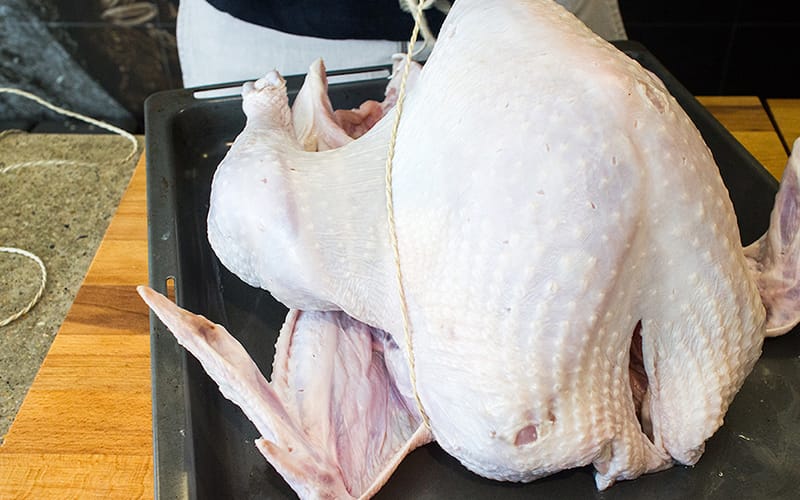
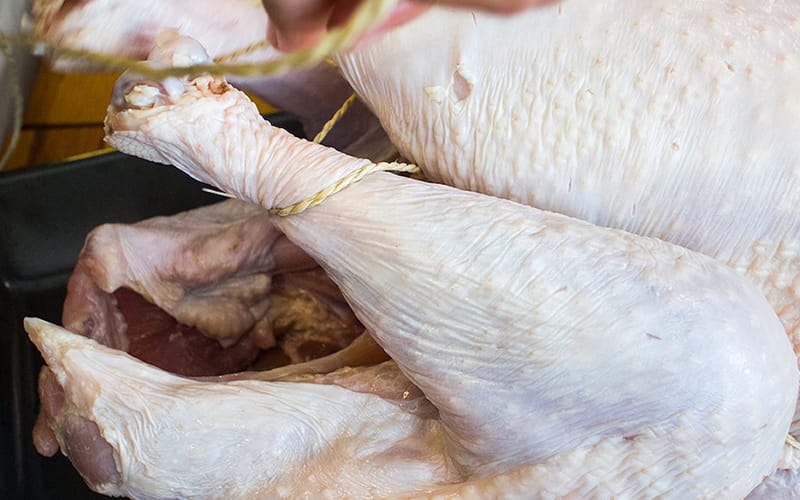
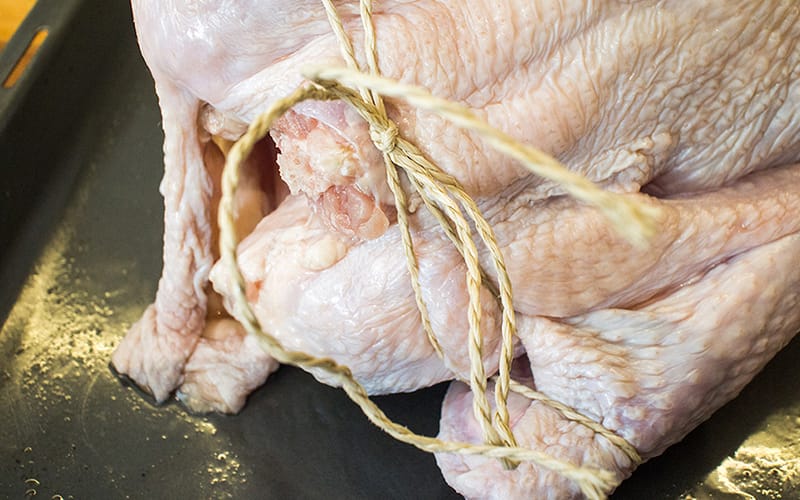
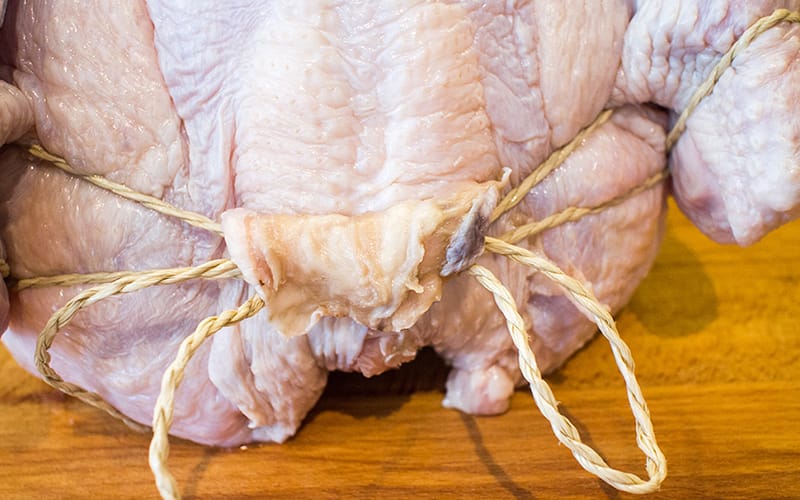
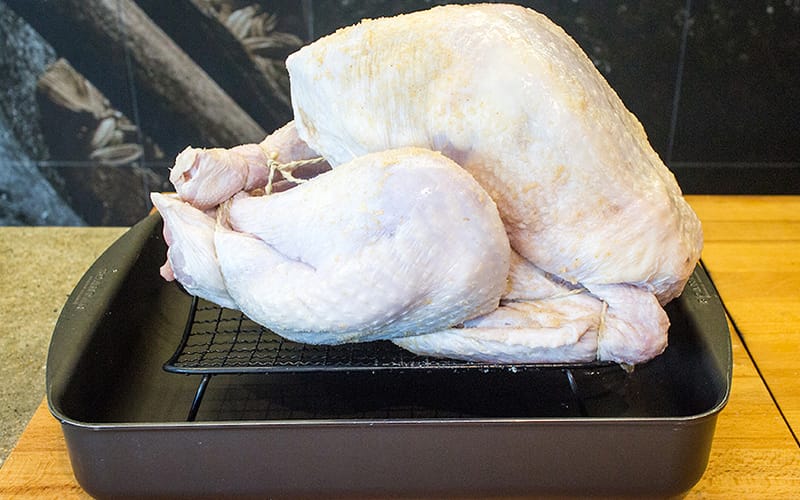
Step 6: Trussing
Why truss a turkey? For two important reasons: firstly, trussing ensures the wings and legs cook evenly. Secondly, it keeps your turkey in a tight little bundle and so it looks good on the table when served, for an absolutely Instagram-worthy roast turkey.
Trussing isn’t difficult, but you may need a few tries to get it right if you’re a beginner. Get a 3m-long piece of baker’s twine (or longer if you have a larger turkey), and here’s what you do:
- Lay the turkey flat on its front and slide the middle point of the twine underneath the neck.
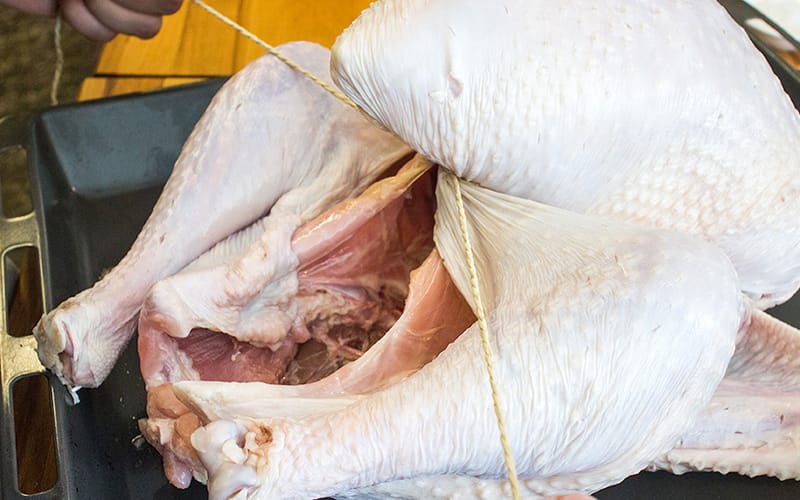
- Slide the twine under the breast until it’s level with the front wing joint connecting the wing to the breast. Pull taut and bring the twine over the top of the joint, wing and thighs on each side. Importantly, the wings must be tucked in under the thighs, not over it!
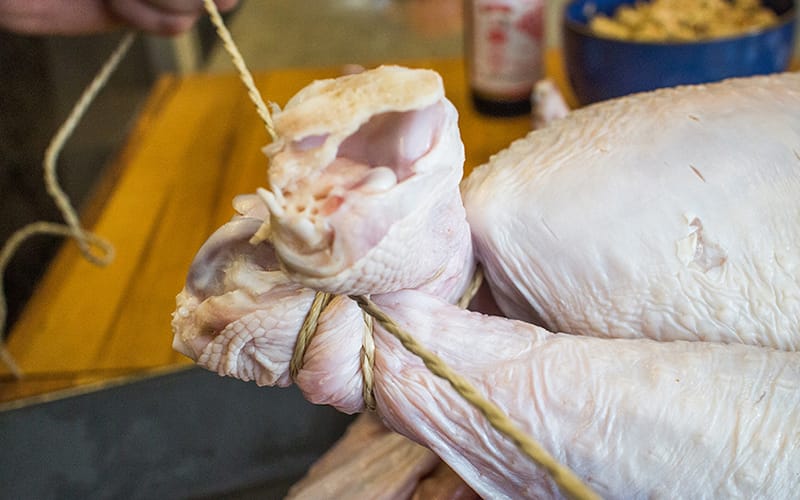
- Criss-cross the twine under the backbone, just above the cavity opening. Pull firmly. If your trussing is slipping, tie a dead knot here.
- Loop the twine around the drumstick end on one side, then repeat with the other drumstick.
- Pull the drumstick ends together and arrange so they are “cross-legged”. Criss-cross the twine and loop it around the drumstick again, finalising with another criss-cross. Feel free to knot this to secure drumsticks in place.
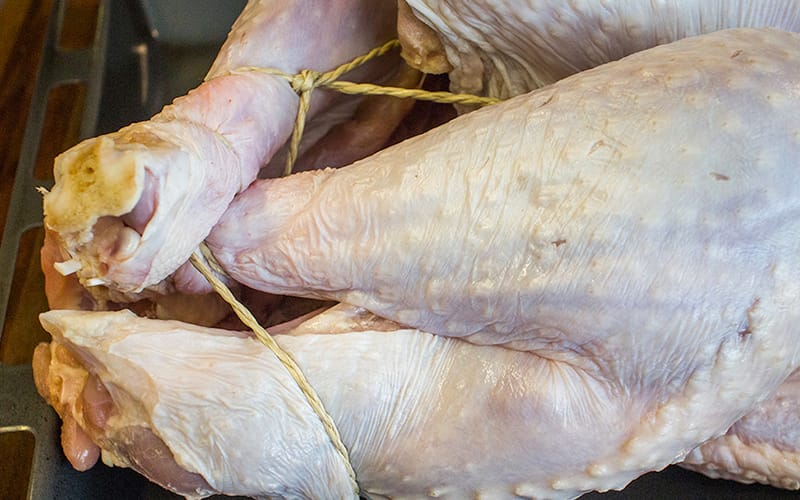
- Pull the twine underneath the thighs and cavity opening so that the drumsticks cover the opening. Knot to secure.
- Run the twine to the front of the bird, along the wing. Loop it around the wing joint, hooking it around the protruding tip.
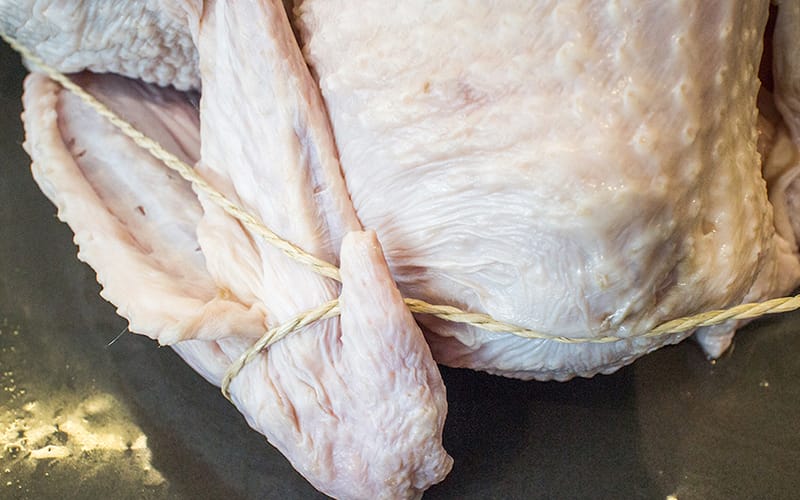
- Bring the twine back across the neck, to where you first started trussing. Tie a strong knot to keep it in place.
- Snip the excess twine or tie it into a bow. If there’s excess neck skin, tuck it under the twine to keep things neat.
Here’s a handy pictorial guide:
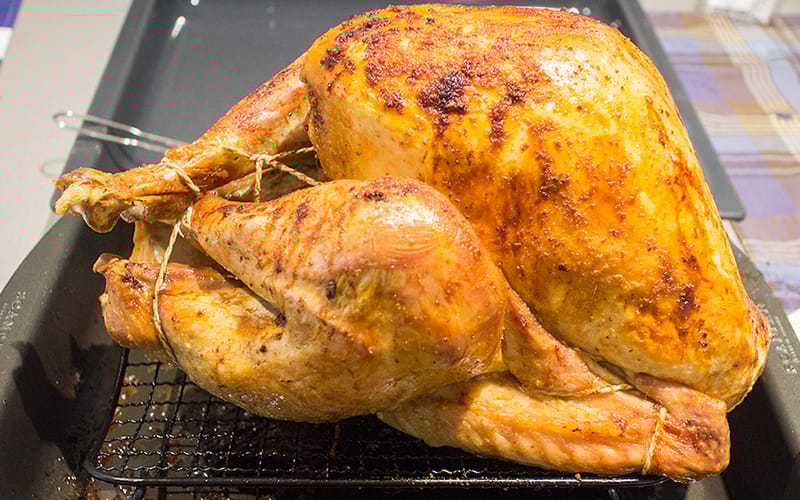
Step 7: Roasting your turkey
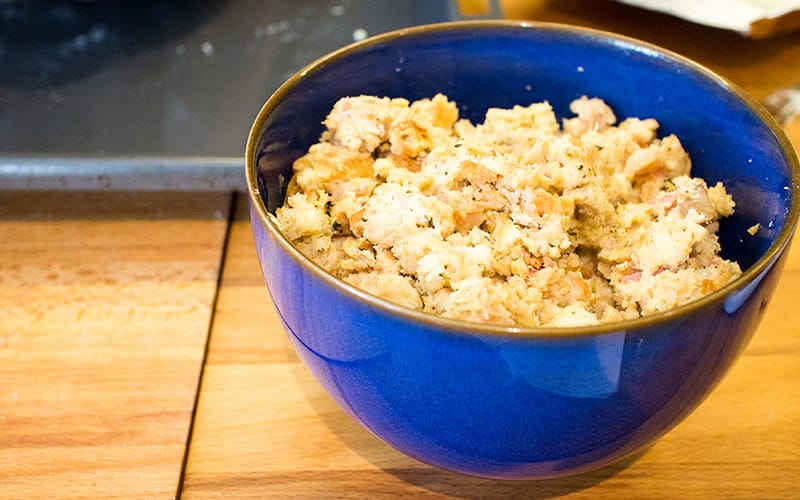
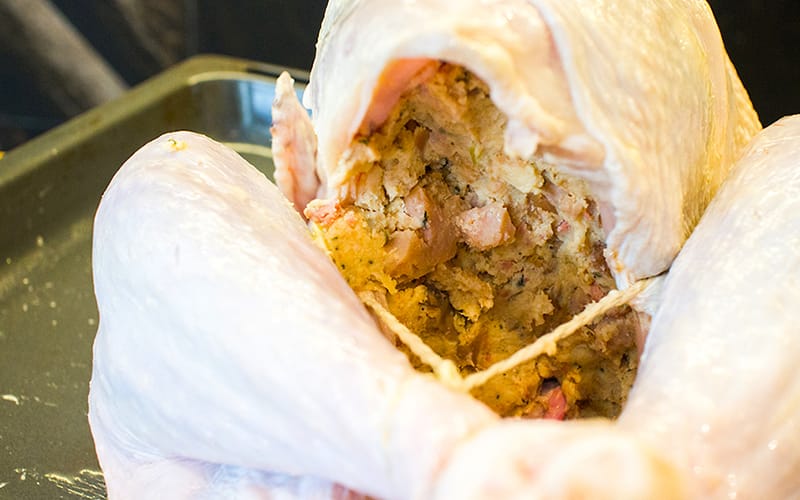
It’s finally time to get your roast on! Feel free to make your own stuffing (Google is a helpful resource), or opt for the store-bought version.
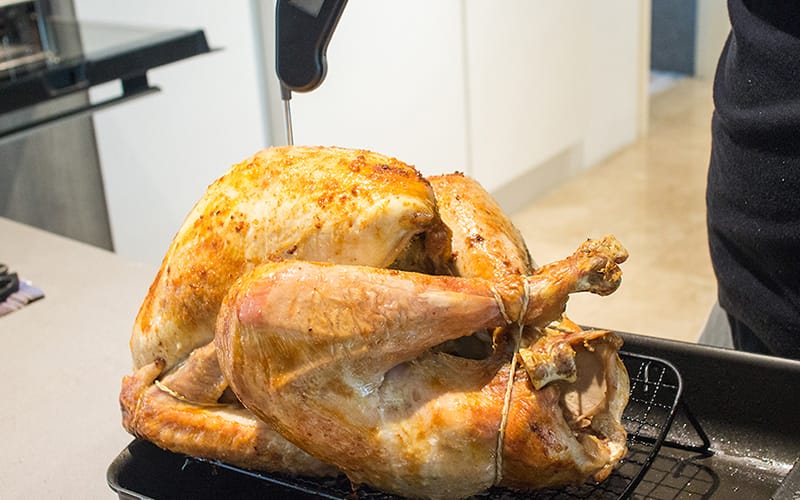
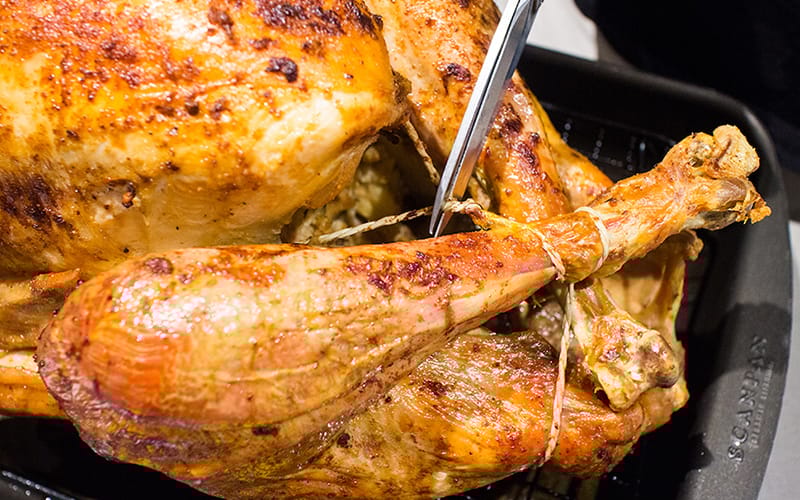
You will also need a meat thermometer and a roasting rack for the following steps:
- Set your oven to 180°C on the convection (fan) setting. Use the heat source furthest from the breast; typically, you’ll want to use the bottom heat source only.
- If you’ve trussed your turkey but have not put in the stuffing, now’s the time to shove it into the cavity. The stuffing needs to be quite packed to ensure there are no air pockets.
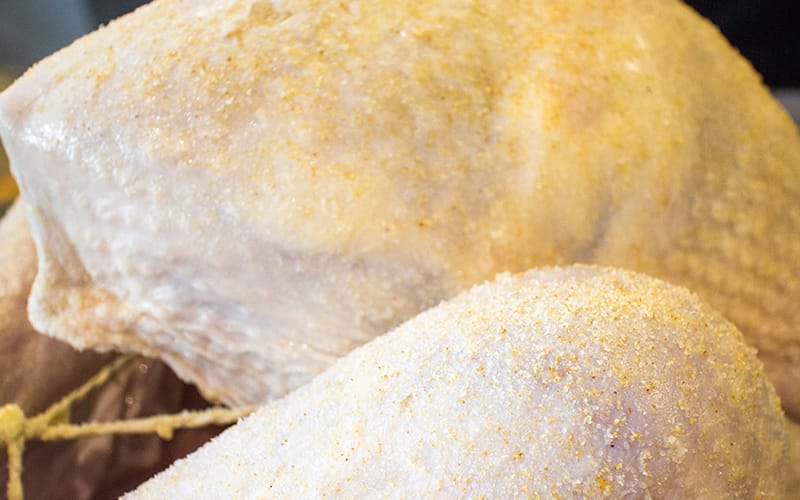
- Mix garlic powder, onion powder and fine salt, then sprinkle generously and thoroughly all over the skin. Use your hand to pat the salt and powder mixture onto the skin but don’t rub it in.
- Place the turkey on a roasting rack over a roasting pan. The rack ensures the air circulates around the bird and cooks it evenly, while the roasting pan catches some very important juices.
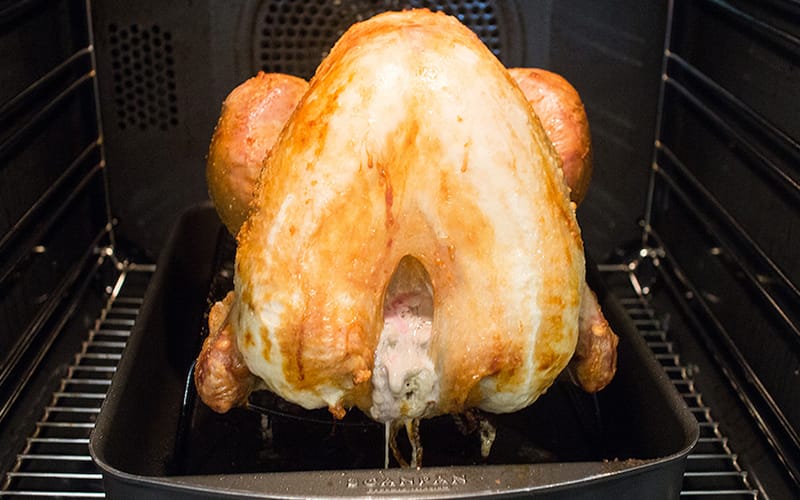
- Once your oven is sufficiently hot, place the turkey on the lowest rack. The interesting thing about cooking turkey is that you’re looking for two different temperatures for two different parts of the same bird – 65°C for the breast, 74°C for the wings. This makes cooking turkey as a whole bird a little tricky as one part is bound to get overcooked, so it’s important to keep an eye on your bird.
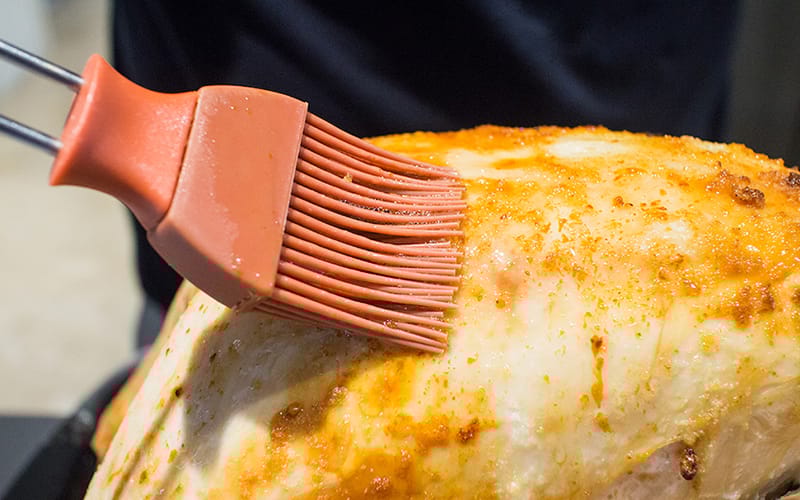
- Baste the turkey surface every 30 minutes with juices from the pan.
- While the turkey is out of the oven, poke a cooking thermometer into the thigh and then the breast. Generally it’ll take at least 90 minutes (for a 4kg bird) to get close to the ideal temperatures as mentioned above, so you only need to test it after about an hour in the oven.
- After 1 hour, turn the oven temperature down to 150°C and check using your cooking thermometer every 20 minutes. The higher heat browns the skin and dries it up nicely, while the lower temperature makes sure the meat is cooked well.
- Once the entire turkey is cooked, remove it from the oven. Let it rest on the roasting rack for one-third of the overall time it was in the oven for.
- In the meantime, remove the juices from the pan and set aside for gravy.
- Once the turkey is cooler to the touch, cut and remove the trussing and discard.
- The turkey should be served whole. When you’re ready to dig in, carve it up before serving.
Don’t miss the final part tomorrow, where you’ll learn how to carve your turkey and prepare a rich, delicious gravy!
This article first appeared in butterkicap.com, a food and culture platform and community that enables anyone to experience Malaysia through stories of its people, food and places.